Over the past month or two, I’ve been learning about plastic recycling with a friend at a local makerspace. We decided to start out with HDPE as a nice beginner’s material, because it melts at less than 200C and tends to be fairly nontoxic. We’ve tried a few different techniques now, and we’ve learned a lot about what doesn’t work.
This is an exciting field and we hope to make a decent press for forming 3mm and 6mm-thick HDPE sheets soon, but our early designs have shown us some key difficulties to be aware of if you are planning to start recycling plastics on your own. And I’ll mention this later, but please research what you plan to recycle ahead of time and avoid plastics which might release hazardous fumes. As you will see, I am not an expert.
Our first instinct was to imitate an injection-molding press, and we started by scavenging some large heating elements from a Goodwill-sourced griddle. It consisted of four ~13-Ohm coils arranged as two parallel banks, each consisting of two elements in series. That meant an effective resistance of 13 Ohms, or a bit over 9 amps at the mains 120V which it was more or less directly connected to.
We wound up clipping the heating coils out and scavenging some of the crimped and heat-insulated wiring, strapping them to a smooth-bore metal pipe, and then soldering or spot-welding the four coils back together in their original 2×2 arrangement. Temperature monitoring is all well and good, but this was a first attempt; we just wired the coils across a 2-prong plug, and flipped a surge suppressor on and off to control the heat. A handheld infrared thermometer gave us a rough indication of the tube’s temperature, and we aimed for 350-400F to melt the HDPE.
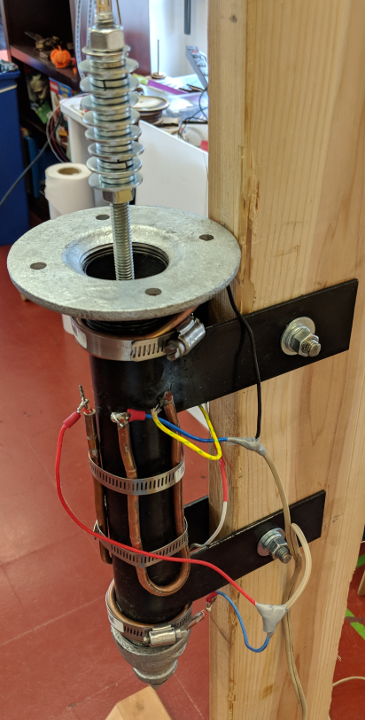
Our first attempt at a plastic-melting tube; the heating elements are the thick copper-coated wires, and the beige wires connect directly to a 2-prong wall plug.
This first attempt did technically work; we needed welding gloves to hold the metal ‘plunger rod’, but after pressing a couple of shredded detergent bottles and milk jugs in the top, we were able to remove the bottom plug and push the gooey plastic slurry through the pipe and into a mold where it cooled into a brick as we clamped a lid down to press out the air and force the plastic into the mold’s rectangular shape. Unfortunately, the assembly required about 1000W of power for a couple of hours to produce a modestly-sized brick. This sledgehammer approach was not about to save the planet.
V2: Into the Space Age
Thankfully, we live in the future and there is a staggering variety of materials available to us for Making Things Better. Our second design followed the same tubular approach as the first, but we did a little bit more designing ahead of time, and used a 12V DC power supply with a ~1.2-Ohm, 14-gauge Kanthal A-1 heating element wrapped around a steel pipe with thinner walls. It wound up taking a bit longer to get up to temperature, but the ~100W consumed by the entire system made it much more energy efficient.
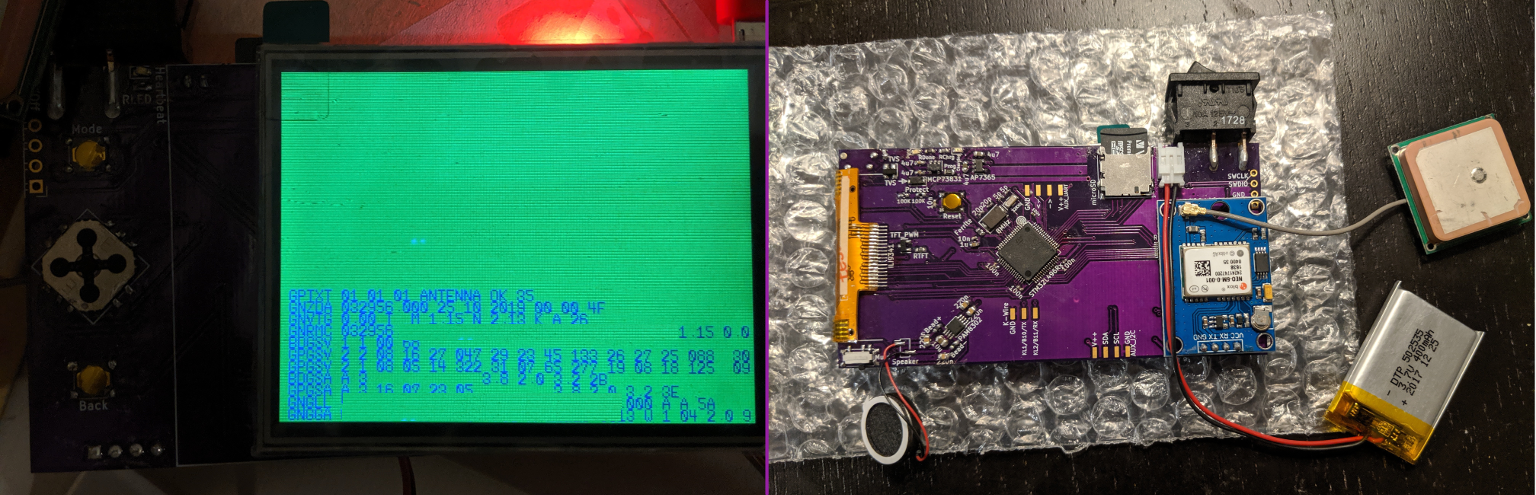
To regulate the plastic-melting temperature, two 100K glass Epcos thermistors were placed along the pipe and read by a microcontroller. One thermistor was pressed against the Kanthal heating element, while the other was placed evenly between the turns of the resistive wire, against the steel pipe. The former would detect if the coils were getting too hot for the polyimide ‘Kapton’ tape used in assembling the device, while the latter would report a slightly more realistic estimate of the plastic’s current temperature.
To minimize heat losses, a ‘ceramic wool’ insulation was wrapped around the tube and heating element. And since it’s usually a poor life choice to breathe or touch fluffy insulation materials, the insulation was cut to a slightly shorter dimension than the pipe, and quickly wrapped in a few more layers of ‘Kapton’ polyimide tape.
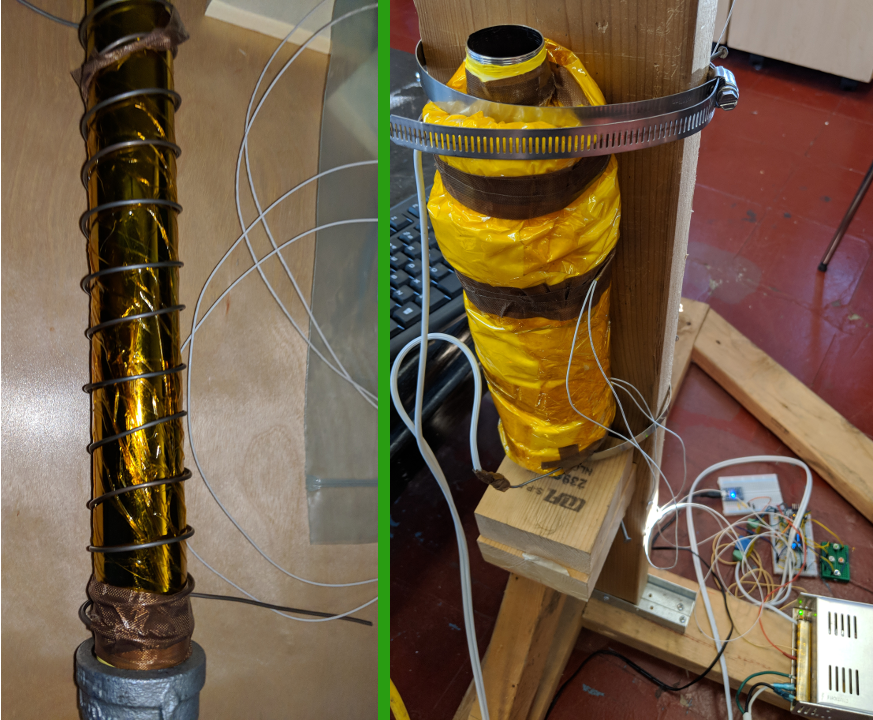
Our second attempt at a plastic-melting tube, both before (left) and after (right) being wrapped in insulation. The resistive heating wire is visible in the left image.
This also worked, a bit slower but using about a tenth as much energy. Unfortunately, the design made it difficult to press the plastic out of the tube, as there was no easy way to fix the entire assembly to a firm anchor.
It was starting to seem like modeling our designs after injection-molding machines didn’t make a whole lot of sense. We only wanted to make machinable bricks, and we weren’t planning to use any injection molds.
V3: The Girl Scout Oven
By this point, we had been talking to a few people about what we were doing. One mentioned a classic technique that they called a ‘dutch oven’ or ‘girl scout oven’, which is good for cooking on camping trips and could apparently reach 200C easily when heated by coals. They pointed me towards a good instructables describing the basic technique, and it wasn’t long before we were wrapping slabs of cardboard in aluminum foil.
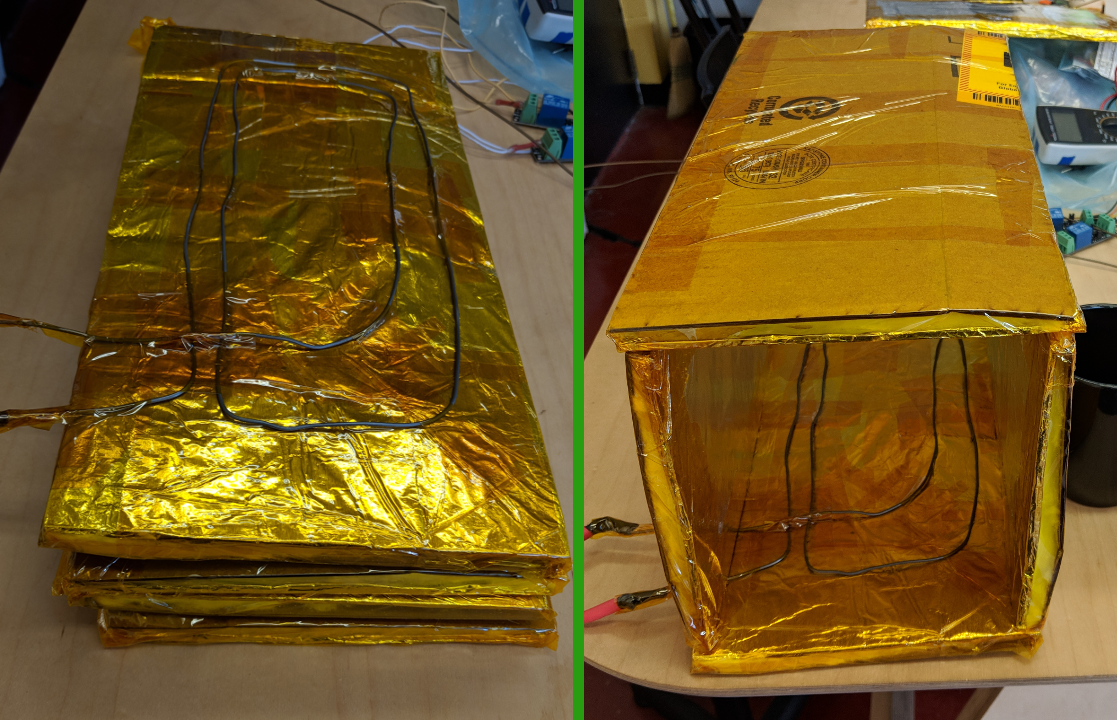
Our third attempt at a plastic-melting machine was a collapsible cardboard oven with a heating coil in the base. A wooden mold full of plastic went in the center of the coil, with a lid that was regularly pressed down. Square ‘doors’ also fit in the open gaps on each end to keep the heat in.
In the base of the oven, a ~1.2-Ohm Kanthal heating coil was placed with a 12V DC power supply driving it. At the center of the coil, a wooden box was placed to act as a mold. We placed plastic shreddings into the box, and pressed a wooden lid over them to get rid of air pockets as the plastic melted. Railroad spikes handled with welding gloves were eventually used to weigh the lid down, because the wood got too hot to touch.
We chose wood as a material for the mold because it was easy to laser-cut and glue together, it was cheap, and it was insulative enough that it wouldn’t immediately burn anybody who accidentally touched it.
This approach also worked, but the results were a bit underwhelming. It took several hours to melt a fairly small amount of plastic, and insulating the space between the reflective aluminum layers and the outer cardboard layers did not improve matters very much. We may have had better luck if we had followed the instructable linked to above more closely; this design had some air gaps since it was fold-able. Anyways, it’s good to know about for your next camping trip!
V4: It Can’t Be That Simple
Despite the missteps, we did end up with several nice-looking bricks which people (ourselves included) kept mistaking for oversized Starbursts. We were very impressed with the lightness, toughness, and machinability of recycled HDPE; a Shapeoko woodworking CNC mill ate through it about as quickly as the machine could run, and the material was shockingly solid in brick form. It seemed like a project that was worth pursuing, but there was something about extruding cylinders of plastic that didn’t seem ideal for producing rectangular bricks of material, and our first ‘oven’ design hadn’t turned out too well.
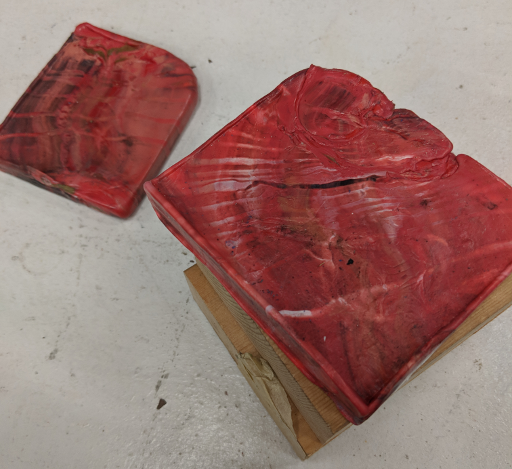
Mmm, tasty.
It’s worth noting at this point that a toaster oven works well for experimenting with this sort of plastic recycling, if you want to try this at home and have an oven that you aren’t planning to cook with ever again. Just get some heat-resistant gloves, toss a shredded detergent bottle into a pan at 400F, and knead it into a ball like play-doh to get the air bubbles out once it gets soft and melty. When it becomes a consistent ball of putty, place it into a mold and press the lid down with clamps. When it cools, you’ll have a plastic brick. But this is a tedious process and most toaster ovens are also fairly high-power appliances.
So we went back to the drawing board. Our fourth design was a bit unorthodox, but very simple. We found two 3-Ohm, 50W wirewound resistors in a parts bin, and we bolted them to an aluminum plate before soldering them together in parallel with some 18-guage lamp wire that connected across a relay to a 12V DC power supply.
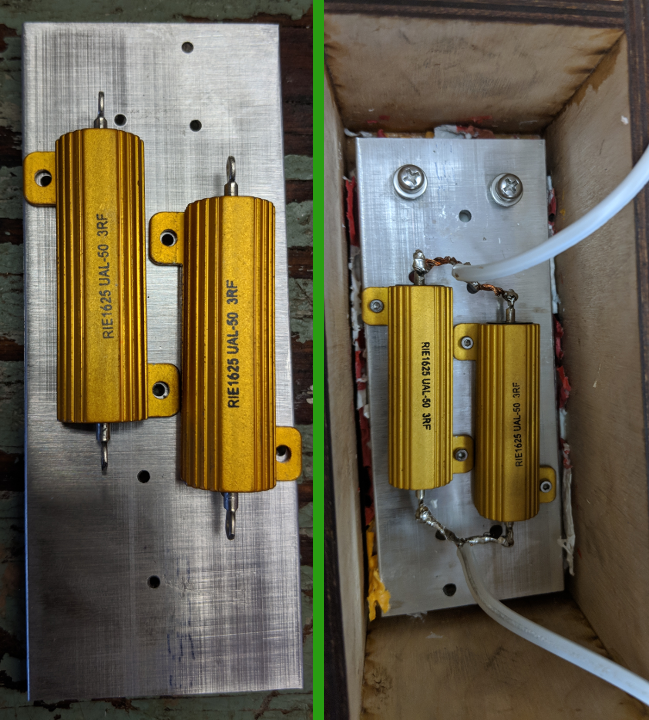
Our fourth attempt at making recycled plastic bricks. The gold-colored blocks are 3-Ohm wirewound resistors, bolted to some scrap aluminum.
This would consume a similar amount of power to the ‘V2’ pipe – about 100W – but the heat would be concentrated into a flat aluminum plate. With an open wooden box that had similar dimensions to the plate, we could produce a ‘press’ to both melt and compress shredded HDPE at the same time.
This worked very well, but unfortunately we had drilled a few extra holes in the metal lid, and the bolts holding the resistor on extended below the plate and into the plastic brick. Because of that, the plastic had gripped the lid in place after it cooled, and we had a lot of difficulty separating them. Chisels and mallets were involved. Noise complaints were made:
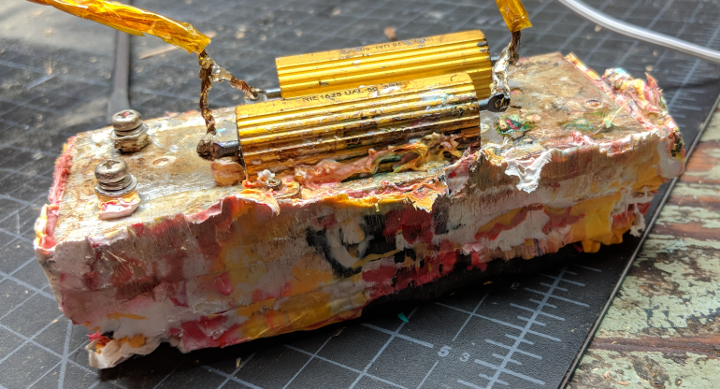
Whoops; in the next version, the underside of the plate will be smooth and flat to prevent this sort of sticking.
But we did get a bona-fide HDPE brick, which makes us believe that the ‘heated lid’ approach can work to press plates of 3mm and 6mm thicknesses for laser cutting. It looks like HDPE is a melty material, but it should still cut well in thin sheets.
Conclusions
We can’t wait to start recycling plastic into more uniform sheets for producing custom plastic parts. If nothing else, you get very nice properties at less than about 100C, and it can have an absolutely gorgeous finish. Here’s a jig that we CNC-milled for holding a board in place for stencil-soldering. It is made out of a detergent jug, a protein shake bottle, and a 6-pack holder:
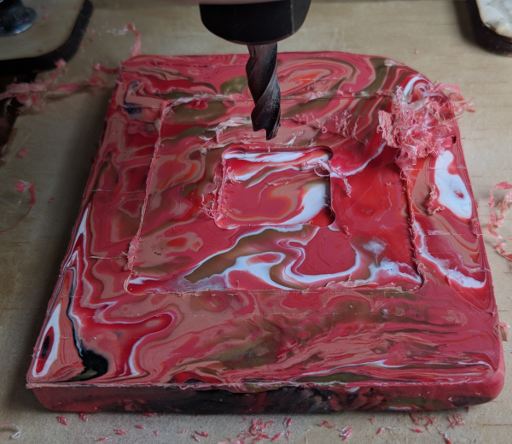
One of our recycled bricks, milled into a jig as a test. It looks great!
Nice. Thanks to Rory and everyone else at Seattle Makers for the equipment and expertise!
Also, we only tested the methods presented in this post with #2 HDPE plastics. #4 plastics are LDPE and should behave similarly. #5 plastics are polypropylene and should work despite a slightly higher melting point, but they may also have plasticizers mixed in which you don’t want to breathe. Never melt down #3 vinyl-based plastics, as they can produce highly toxic fumes which are harmful to both you and the environment. #1 PET plastics (soda, juice, and water bottles) should be fairly easy to recycle, but they have a high melting point which is close to where the silicon adhesive on the ‘Kapton’ polyimide tapes that we used starts to break down.