As someone who likes both electronics and the outdoors, sometimes I get anxiety about a lack of electricity. It would be nice to go camping somewhere away from it all, and still be able to charge things and run some lights, a display, maybe a small cooler. I’m sure some of you are rolling your eyes at that, but I’ve also been wanting to play with adding aftermarket indicators to old cars, like backup sensors or blind spot warnings, and it’d be nice to run them off a separate battery to avoid the possibility of accidentally draining the car’s battery overnight.
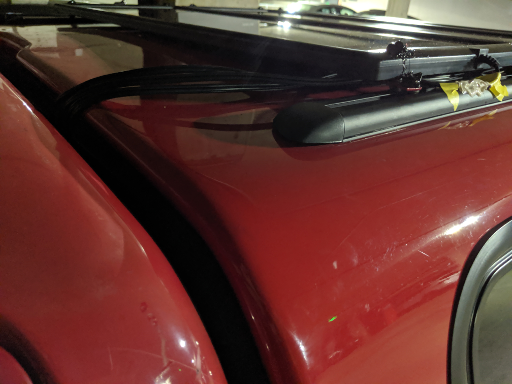
Since low-power solar panels are fairly cheap these days, I figured that it might be worth buying a few to mount to my car’s roof. And since my car is technically a pickup, it was very easy to put the battery in the bed and run the wiring through the canopy’s front window:
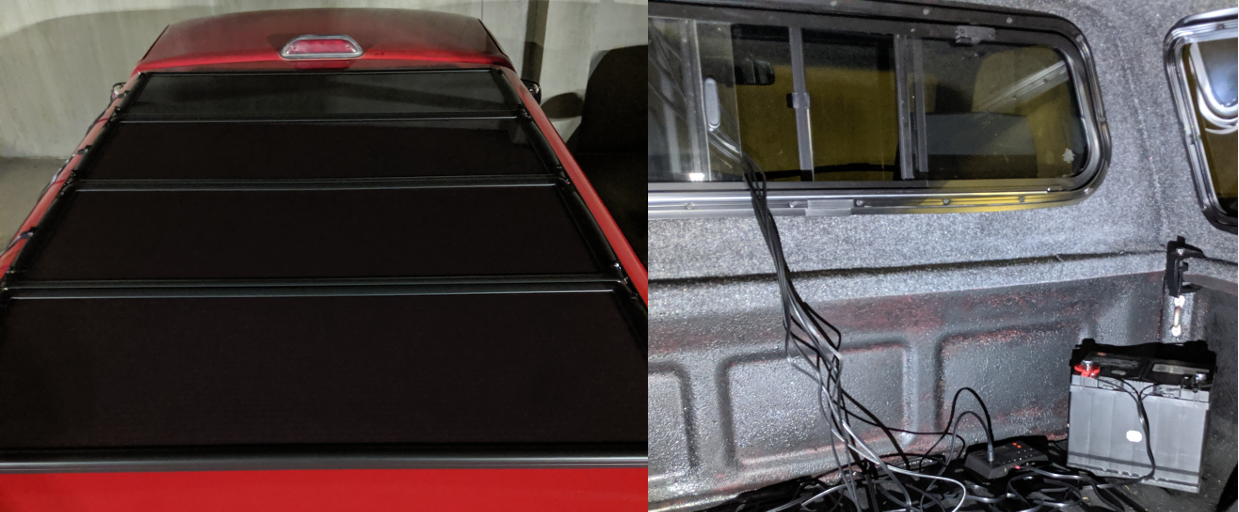
I’ve secured the battery a bit more since taking these pictures, but this is the basic idea – it’s pretty simple.
If you have a different kind of car, I’d imagine that you could just as easily put the battery in your trunk, but you might need to drill a hole for the wires if you don’t want to leave one of your windows cracked open.
I guess that a lot of this guide won’t apply exactly to your situation, because you’ll have different dimensions to work with, different limitations, and probably different solar panels. But I hope that laying out each step that I took and what worked for me might be helpful – your basic approach could probably look very similar.
And before we go any further, please keep your expectations in check. These panels can only produce up to 100W in direct sunlight, which is nowhere near enough power for something like an electric vehicle. So read on if this sounds interesting, but the car still runs on gas. We’re not saving the world here.
Step 1: Basic Design
Before you actually go out and buy a bunch of parts, it’s a good idea to design your basic system and get an idea of how much space you have to work with. Fortunately, we’ll be working with relatively modest amounts of power, so we can get away with a pretty simple system. The whole thing can be summed up in this diagram:

The basic electrical system – it’s pretty simple.
The solar panels generate power, and the charge controller uses that power to charge your battery. If you buy a kit, it will probably come with some sort of charge controller, but you can also buy them separately. Just be sure that the charge controller you get is designed to work with the type of battery you have.
In addition to the solar panels, charge controller, and battery, you might also want a power inverter to generate an AC voltage from your battery. These have “wall plug” outputs, and they come in various sizes depending on how many Watts of power they can deliver at their rated AC voltage.
These electronics are all very simple to connect, and each part should come with an instruction manual that explains how everything fits together. The hard part is physically mounting the panels onto your car, and getting the wires where they need to go while keeping everything tidy. Remember, you’re going to be driving on the freeway at 90 60 miles per hour with these at some point. You don’t want any dangling parts or connections that could shake loose.
Keeping that in mind, I think you’ll need some sort of tracks or rails on your roof if you want to do this. If you have an alternative approach I would be interested to hear about it, but I’m going to assume that you have two parallel tracks to bolt your solar panels to.
In an ideal world, we would be able to buy solar panels that are exactly as wide as the distance between the rails, but we don’t live in an ideal world. I tried – I measured the distance and found a kit from Harbor Freight which looked like it had an identical length (39 inches). But when I got home and checked, the panels were exactly one inch too short. Drat:
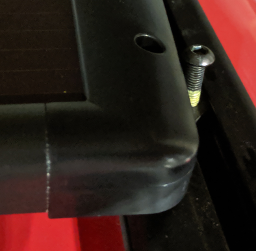
So close – but the mounting holes in the panels aren’t quite big enough for the Thule mounting screws anyways, so this ended up working out pretty well.
I thought about returning them and looking for different ones, but I doubt I’d be able to find a panel that fit perfectly. And the four panels included in the kit fit the length of the rails with only a few inches to spare, so I decided not to get greedy. Instead, I got some metal shims with two holes spaced a half-inch apart. The solar panels bolt to one hole, and the rails to the other.
If you can find panels with dimensions that are ‘close enough’ like this, you just need a small rectangle of steel or aluminum with two holes at the right spacing. This would be easy to make with some simple machine tools, but I don’t have any at the moment. So I just picked up some mending braces with the right pattern of holes from a hardware store and cut them to size. A half-inch is a pretty common dimension, so I sort of got lucky there. If you make your own, I think you should make the holes at least 6mm in diameter. The roof-mounting hardware that I got used M6 bolts, and the solar panels used M5.
The only other design consideration is where you’re going to put the battery / charge controller, and how you’re going to get the wires from the solar panels to the charge controller. In my case, this was easy. Everything goes near the front of the bed, and the wires go under the panels and through the canopy’s front window. You might need to get creative for this part – let me know how it goes if you do!
Step 2: Make Sure Everything Fits
Once you have a basic design, it’s a good idea to lay out all of the parts that you think you’ll need and walk through the process of loosely installing one panel. It’ll give you an idea of how everything fits and where you might want some extra spacers, differently-sized fasteners, that sort of thing.
Also, a disclaimer before we start: try to avoid doing this work outdoors on a sunny day. If solar panels generate too much power when they aren’t connected to anything which can store it, that can damage them (or you). It probably won’t be a problem with the low-voltage 25W panels that I’m using, but it’s good practice to do maintenance on solar systems while the panels are “dark”.
Anyways, I started by attaching four of the metal spacers to each corner of one panel with a bolt, a nut, and a couple of washers.
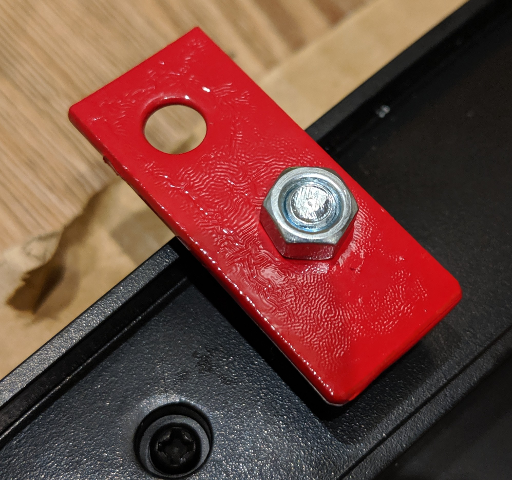
I ended up cutting some plated steel brackets in half, so the spray paint is to ward off rust.
It looked okay, and the bolt wasn’t sticking out much, but at this point a friend suggested using rubber washers instead of metal ones to hopefully reduce vibrations, and that seemed like a good idea so I made the switch.
Next, I took the panel to the car and attached it to the roof rails with the Thule mounts – this also worked okay, but I was left with a lot of empty space along the M6 bolt connected to the trapezoidal nut that sits in the roof rail.
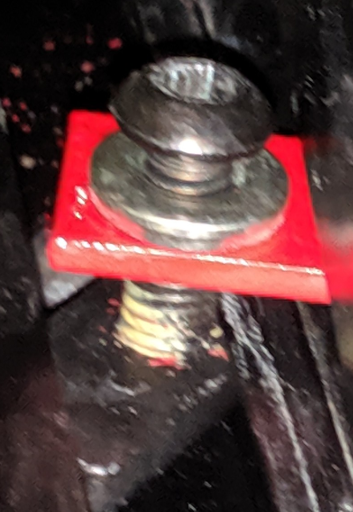
First attempt at mounting a panel. It’s pretty loose, but there’s still a bit too much room along the bolt.
It was too much space to plug with a rubber washer, so I improvised and got some rubber grommets instead. I hope that the extra few mm of cushioning will keep the panels comfortable when I hit a pothole, and it should also help shield the bolt’s threads from the elements:
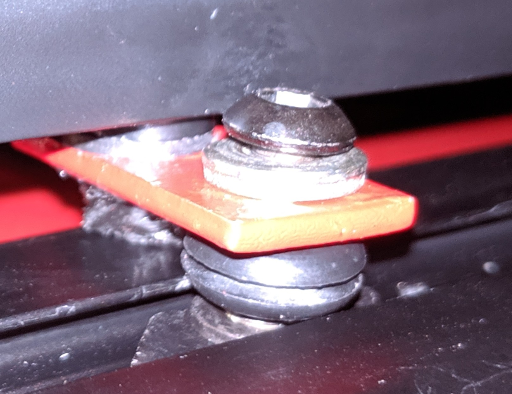
That’s better – it’s still loose enough to move along the rails, but the grommet still provides some cushioning once it’s tightened.
At this point, it’s also a good idea to check that the wire connected to the solar panel can reach all the way to the charge controller. Once you’re confident that everything will fit together without needing any new parts, it’s time to actually put the thing together 🙂
Step 3: Assembly
This step is mostly busy-work, since you already know what needs to be done from the last step. But this time, we’re going to fix our fasteners in place semi-permanently with silicone sealant. Solar panels are pretty fragile, so it probably isn’t a good idea to attach them permanently. But we also don’t want any parts shaking loose on the highway, and you don’t want anyone with a screwdriver to be able to lift them off your car in a few minutes.
Silicone sealant is easy to apply and while it can be removed, it takes a bit of patience and sometimes solvent. Especially if you apply it to the threads of your nuts and bolts before you connect them, it should discourage a casual crime of opportunity. Move to a well-ventilated or outdoor area, then start by applying some sealant to the nut/bolt which connects the solar panel and the metal spacer. Do this before you put the panels on your roof, because this nut will be facing downward after it is installed on the roof and you won’t be able to reach it.

Silicone-sealed nut.
I like to apply sealant to the threads, fasten everything, and then apply a big dollop over the whole connection. Let it cure for 24 hours, then continue with the installation steps that you worked out in the previous steps.
I ended up attaching the panels one by one, standing on the tailgate and under-tightening the mounting bolts so that I could slide each panel down the rails as I finished to make room for the next one. I positioned the group of panels in the ‘middle’ of the roof rails, which left a couple of inches on each end near the front and back. In the future, I’d like to mount a little scoop in front of them to shield them from wind / dust / bugs, but I’m not sure where to buy (or how to make) something like that.
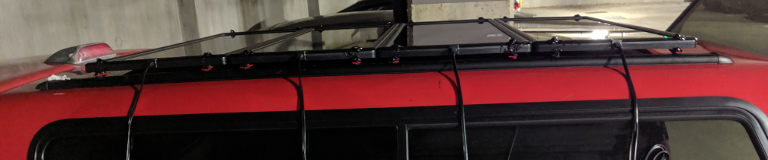
Attached solar panels, before the wiring was done.
Once everything is in the right position, tighten down the bolts connecting the metal spacers to the roof rails, and apply a bunch of sealant over them and the bolts connecting the solar panels to the metal spacers.
Step 4: Wiring
Now that you have solar panels mounted to the roof of your car, it’s time to connect them to your charge controller and battery. You should already have a plan for this – in my case, I planned to run the wires under each panel and through the front window of the truck’s canopy. This worked well, although it was a little bit tricky to thread the bundles of wires through the few millimeters of space between the panels and the roof.
Solar panel wiring – it turned out pretty neat, once I got all of the wires threaded under the panels.
I also noticed that there was a lot of strain where the wires met the panels, because they were being pulled at 90-degree angle. To help ease that stress, I pulled a little bit of slack and applied some sealant to fix the wire to the roof rail in a slightly more relaxed position. If you do this, be careful not to get any sealant inside of the rail – it can be a pain to scrape off once it cures.
With all of that done, I could simply open the canopy’s front window and drop each connector inside. Then, I followed the kit’s instructions to connect the charge controller to the wires from the solar panels, and the battery to the charge controller.
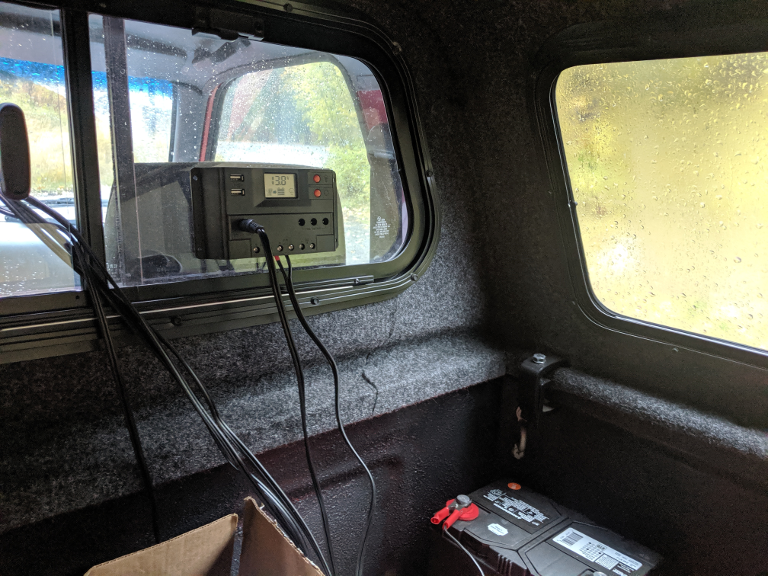
Eventually, I stuck the charge controller behind the passenger headrest to tidy things up a bit. It’s a little harder to read the battery’s voltage from the front, but it’s nice to have a couple of USB charging ports in easy reach even when I’m not camping.
And that’s all there was to it. I set the controller to ‘flooded lead-acid battery’ mode, the battery charges, and the charge controller provides a 12V output. I also got an inverter which can clamp onto the battery, but I leave that disconnected when it is not in use.
Step 5: Battery Safety
A car battery really isn’t the best way to store solar energy these days, but my car could use a new one and the sort of 12V LiFePo4 battery pack that I want to get usually have lead times, so I’m using one as a stand-in. If you do use a car battery, try to get a flooded lead-acid type. From what I can tell, AGM batteries are maintenance-free, but also less forgiving than flooded batteries. If you overcharge an AGM battery, it can damage the battery permanently. If you overcharge a flooded battery, some of the water escapes and you can add it back later.
Overcharging car batteries can also release hydrogen gas, so if you use a car battery to store energy, you should make sure that there is some ventilation. Don’t make a Hindenburg car.
You should also be very careful that your battery’s terminals cannot short. Don’t store it near bits of metal that might fall on it, or better yet, wrap the terminals in an insulating material after you connect the charge controller. And if you can, use tie-downs or bungee cords to constrain the battery in place. Given how heavy lead-acid batteries are, it probably won’t move much, but better safe than sorry.
Also, keep in mind that lead-acid batteries really don’t like being over-discharged. Keep an eye on your battery’s voltage – if the charge controller says that it is low, try to stop using it until it has a chance to recharge. In general, trying to squeeze every last drop out of any sort of battery usually causes it to age faster. I think there’s a lot of very good information about using car batteries with renewable energy in this blog post.
I’m not sure if it would be a good idea to use standard lithium-ion batteries unless you have a plan for keeping them cool on hot days. As is, I’m planning to add a temperature-triggered blower fan when I switch to a LiFePo4 pack. A/C would take too much power, but I’m hoping that decent air circulation can keep temperatures below about 50C / 120F.
Conclusions
All in all, I think this came together pretty well. It’s stable at highway speeds, a handful of fairly severe bumps didn’t shatter any of the panels yet, and it seems to charge quickly in the sun and slowly in the rain. People look down on amorphous solar cells because of their lower efficiency compared to monocrystalline ones, but they are better at generating power in low-light conditions, and rainy days are probably when you’ll want to use the most power. 100W is not a lot of power for the size of the panels, but I’m happy with how modular, affordable, and rugged they seem to be. I’ve taken them on the highways at high speeds, had them frost over, bounced them along gravel roads that rattle cups out of cup-holders, and generally exposed them to the elements; while it’s only been a few months, so far none of them have failed.
I don’t have exact numbers for how quickly the panels charge the battery from 0% to 100%, because I haven’t fully discharged the battery or bothered to take graphs of voltage vs time yet. But it seems to work well enough to keep the lights on while I’m camping. Besides my laptop and phone, it’s also great to have a small renewable power source for USB-charged things like my headlamp, camera, satellite beacon, etc. I also got a 750W inverter, which is overkill for keeping a handful of electronic devices charged. But it also lets me run a small “750W” space heater (which really uses more like 650W) for a few hours in a pinch, although there are enough safety concerns with that that I hope to avoid doing so.
Also, if you get the same Harbor Freight kit as I did, be aware that they come with metal stands attached to the back so that you can set them up on flat ground. You can remove the stands by un-screwing the set screws with a small hex key, removing the plastic cap over the side of the panel that doesn’t have wires coming out, removing the screw at the end of the rail, and then sliding the stand out through the gap. You don’t need to do this, but I was worried about my car’s roof getting scratched up if I left them on.
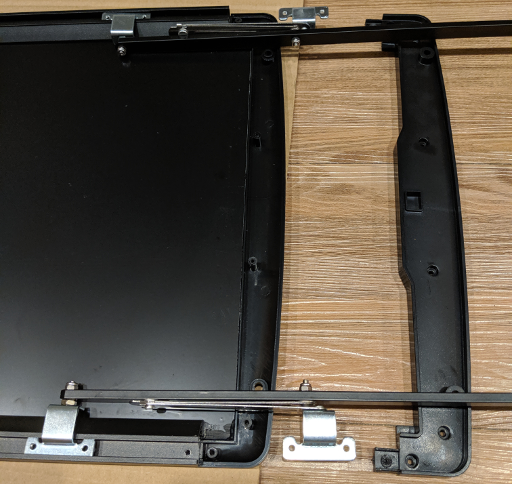
Removing the rear stand from a panel. You have to remove a few screws to get the plastic end off, but it’s pretty intuitive.
Oh, and there’s one other bonus: if you use a separate car battery to store power, then you can jump-start your own car if you accidentally leave the lights on or over-use the car’s climate control in the middle of nowhere. All in all, I’ve been very happy with how this project turned out, and I can’t wait to see more of the country without worrying about battery life 🙂
Now, if only I could find somewhere to work with to install a serious battery pack under the bed and a motor in the front axle…