
Automotive
Mounting Solar Panels to a Car
As someone who likes both electronics and the outdoors, sometimes I get anxiety about a lack of electricity. It would be nice to go camping somewhere away from it all, and still be able to charge things and run some lights, a display, maybe a small cooler. I’m sure some of you are rolling your eyes at that, but I’ve also been wanting to play with adding aftermarket indicators to old cars, like backup sensors or blind spot warnings, and it’d be nice to run them off a separate battery to avoid the possibility of accidentally draining the car’s battery overnight.
Since low-power solar panels are fairly cheap these days, I figured that it might be worth buying a few to mount to my car’s roof. And since my car is technically a pickup, it was very easy to put the battery in the bed and run the wiring through the canopy’s front window:
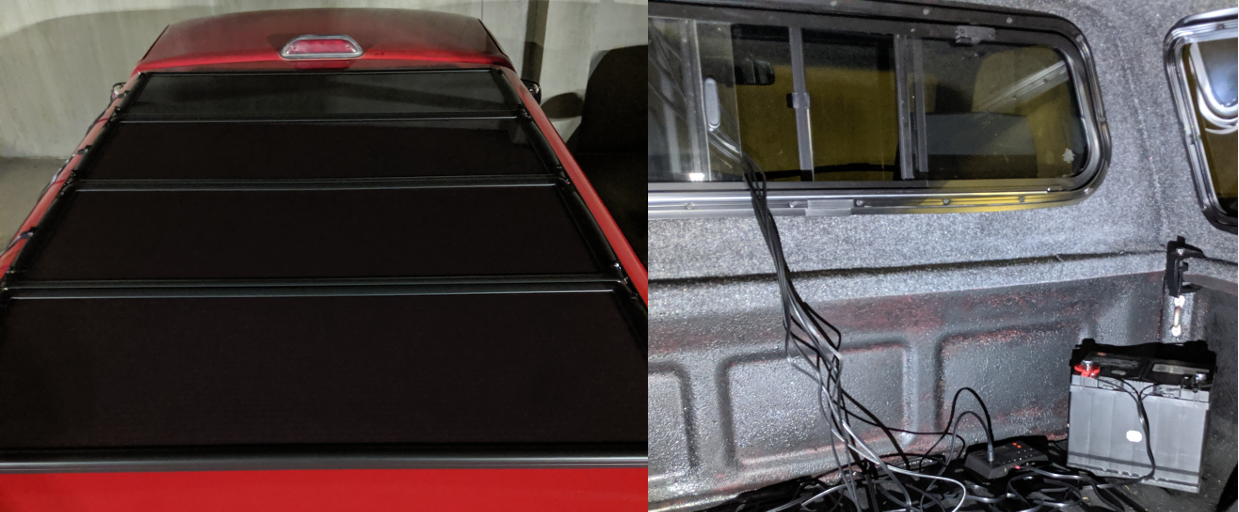
I’ve secured the battery a bit more since taking these pictures, but this is the basic idea – it’s pretty simple.
If you have a different kind of car, I’d imagine that you could just as easily put the battery in your trunk, but you might need to drill a hole for the wires if you don’t want to leave one of your windows cracked open.
I guess that a lot of this guide won’t apply exactly to your situation, because you’ll have different dimensions to work with, different limitations, and probably different solar panels. But I hope that laying out each step that I took and what worked for me might be helpful – your basic approach could probably look very similar.
And before we go any further, please keep your expectations in check. These panels can only produce up to 100W in direct sunlight, which is nowhere near enough power for something like an electric vehicle. So read on if this sounds interesting, but the car still runs on gas. We’re not saving the world here.
Replacing Broken Car Speakers
Some Cars are Old
Recently, I bought a very used car in the hopes of modifying it to use a parallel-hybrid drivetrain. I’d like to cut the driveshaft and slot an electric motor inline with it, and that will probably be the subject of future posts if I can find a garage willing to do most of the heavy lifting and cutting.
But in the meantime, what sort of car do you get if you’re thinking of cutting its driveshaft in half? A cheap one, of course – and my choices were further limited by a few basic requirements:
- The car should actually be a small pickup truck; the bed is an ideal place to put the heavy batteries, they tend to have a lot of ground clearance for fitting a bulky motor underneath the chassis which means little or no changes to the bodywork, and passenger space is not a consideration in this build.
- It should be rear-wheel drive. Since I am planning to add a motor between the transmission and the differential, there needs to be enough space along the driveshaft to fit the motor. That means either rear-wheel drive with the engine in the front, or front-wheel drive with the engine in the back. And I don’t know of any rear-engine pickup trucks.
- It should have an automatic transmission. This kind of simple conversion leaves you with two acceleration pedals, and I don’t have enough feet to use four pedals at once.
So I wound up with a cheap-and-cheerful 1994 Toyota Pickup Truck. It doesn’t actually have a model name; in North America, the Hilux brand was renamed to “Truck” in the 1970s before eventually being replaced with the Tacoma. So this is not a luxury vehicle. It has roll-up windows, it does not have ABS, it came with a broken speedometer, and more importantly its speakers had disintegrated in the decades since 1994.
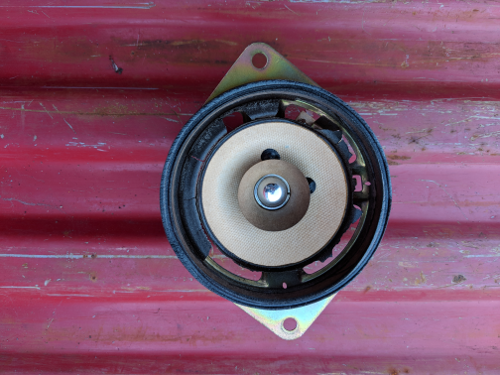
Yikes.
That’s no good, and it sounded like the buzzing of a thousand wasps. Plus, replacing your speakers seems like a pretty easy first project if you want to learn about a car. You only have to remove a few interior panels, and your sound system is a safe thing to break compared to say, your brakes. So let’s get started! These specific instructions may be for a 1994 Toyota pickup, but I’ll bet the process looks similar for the front speakers of other cars.