
Random
Scripting a Box: Making Laser-Cut Battery Holders
Previously, I posted a tutorial about writing SVG files by hand to create simple patterns for a laser cutter to produce. But as I noted at the end of that post, writing that sort of file by hand is not a great solution. It is difficult to make a design that can be modified later, since SVG files don’t appear to have a good way to store variables yet.
So in this tutorial, I’ll go over the process of writing a simple Python script to create the same sort of “divided grid box” as in the previous SVG-writing tutorial across a wide range of dimensions. Then I’ll demonstrate how to use it to create a small 4-cell AAA battery holder out of something that isn’t plastic:
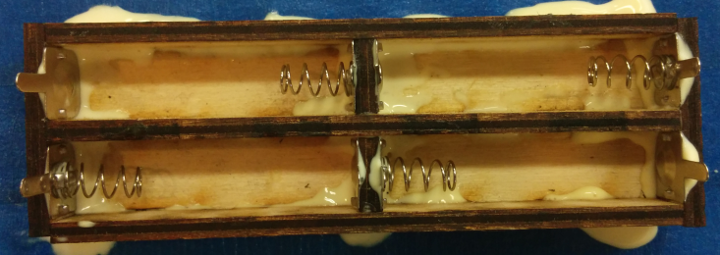
AAA battery case made of laser-cut wood
While “3D printing” a case allows you to add curves and small overhangs to hold the batteries in place, these simple laser-cut boxes can only have perpendicular edges. But I’ve found that using the sorts of spring contacts that you find in most commercial battery cases provides enough pressure to hold the batteries in place, at least until you hold the case upside down and knock it against something to pop them out.
Plus, 3D printing is comparatively slow; a battery case of this size would take between 30-60 minutes to print out on a Prusa i3 running at high speed, but a CO2 laser can cut out these parts in about 60 seconds. You do need to glue the pieces together, but if you adjusted the scripts to account for the “kerf” of your particular laser/material, you might be able to make them press-fit. Anyways, let’s get started!
Writing a Box: SVG Basics
Lately, I’ve been looking for ways to get people interested in basic electronics, and things like kits and/or lessons seem like a great way to do that. I’ve also been looking for ways to learn about making things with a laser cutter, so I decided to put together a stack-able box that could double as storage and a display for available electronics parts at a local makerspace.
The basic idea was simple; start with a box ‘outline’ similar to those generated by Makercase, and then lay out a grid pattern of ‘dotted lines’ to slot crenellated dividers into. I wanted something like a shallow tray, with several horizontal and vertical dividers to hold different types of parts. What could possibly go wrong?
At this point, with a basic idea and maybe a quick sketch, most sane people would open up a program like Autodesk Inventor, Solidworks, or Adobe Illustrator. Options like Inkscape, OpenSCAD, or SolveSpace would also work well if you like free software. But after having some trouble with SVG exports, I wondered if it might make sense to just write the files by hand, for a simple grid pattern.
I guess it depends on your definition of ‘sense’! In this post, we’ll learn how to write SVG files for a small laser-cut ‘test’ box:
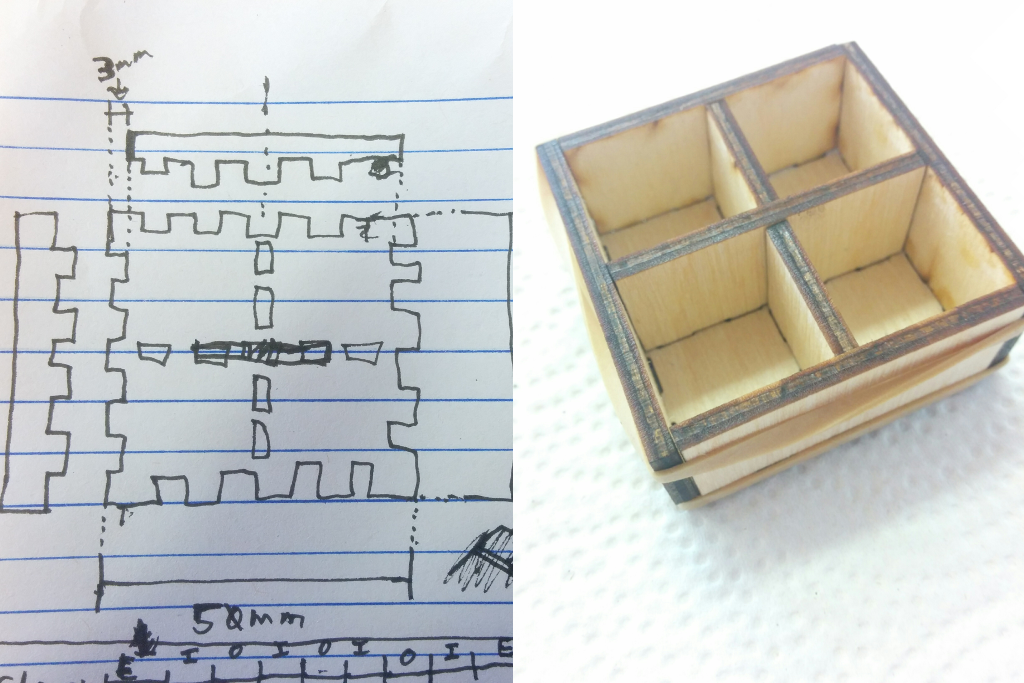
Quick sketch of a test box, and what it’ll look like.